
I wanted to take a pallet and transform it into something really nice with a high quality finish. So I decided to make a reclaimed wood coffee table. This is the pallet I started off with. It was dumped on the side of the road so I was happy to help clean up my local area and do my bit for the environment. You’ll see the wood is actually in very good condition, and it wasn’t too warped, which made the build much easier.

Making the frame and top
After taking the pallet apart with a hammer and crowbar, I combined a few of the thicker pieces with some scrap plywood using glue and screws. This formed an inner frame which was strong, level and square. Notice the diagonal pencil lines in the second photo. This marks out what the table top is going to look like.


Then I cut the pieces for the top, using my mitre saw for the 45 degree angles. It’s important to spend some time carefully picking out the best looking pieces of wood because this will be the most viewed part of the table. I wanted pieces with little damage and a nice grain pattern.
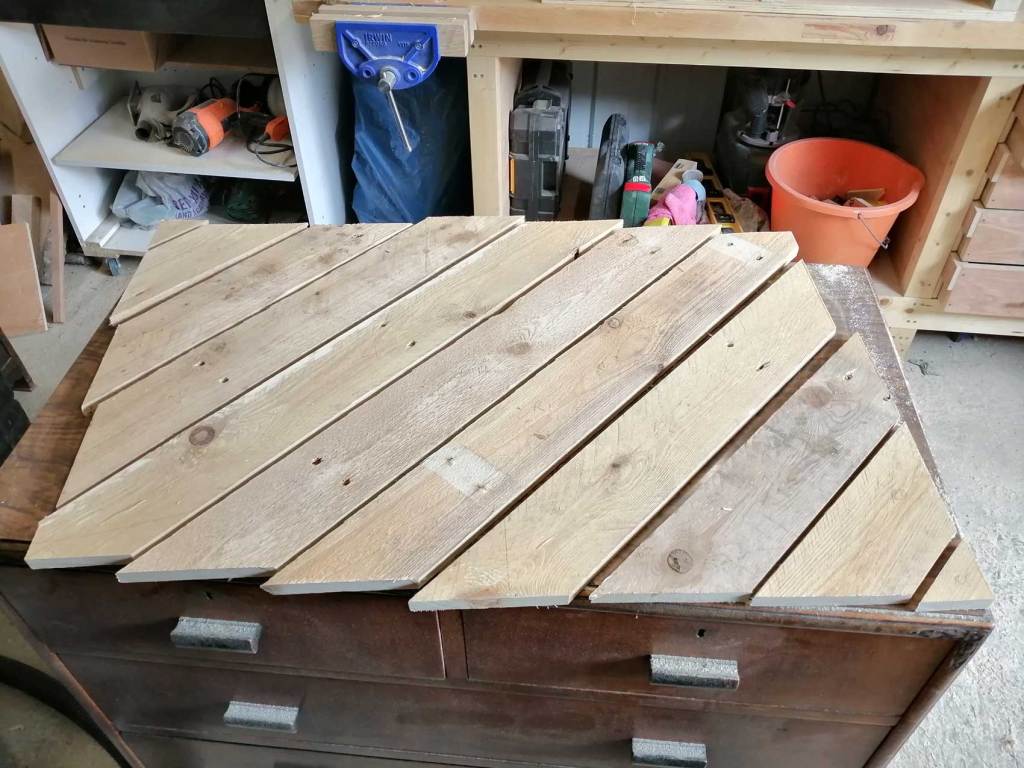
Next I attached these pieces with glue and oval head nails which were driven just below the top surface. I started with the middle piece and worked outwards to ensure a uniform spread. Then I planed and sanded to a smooth, level surface. But I didn’t go too crazy, I left in some of the contours in order to retain that natural feel of the wood.

Making the legs
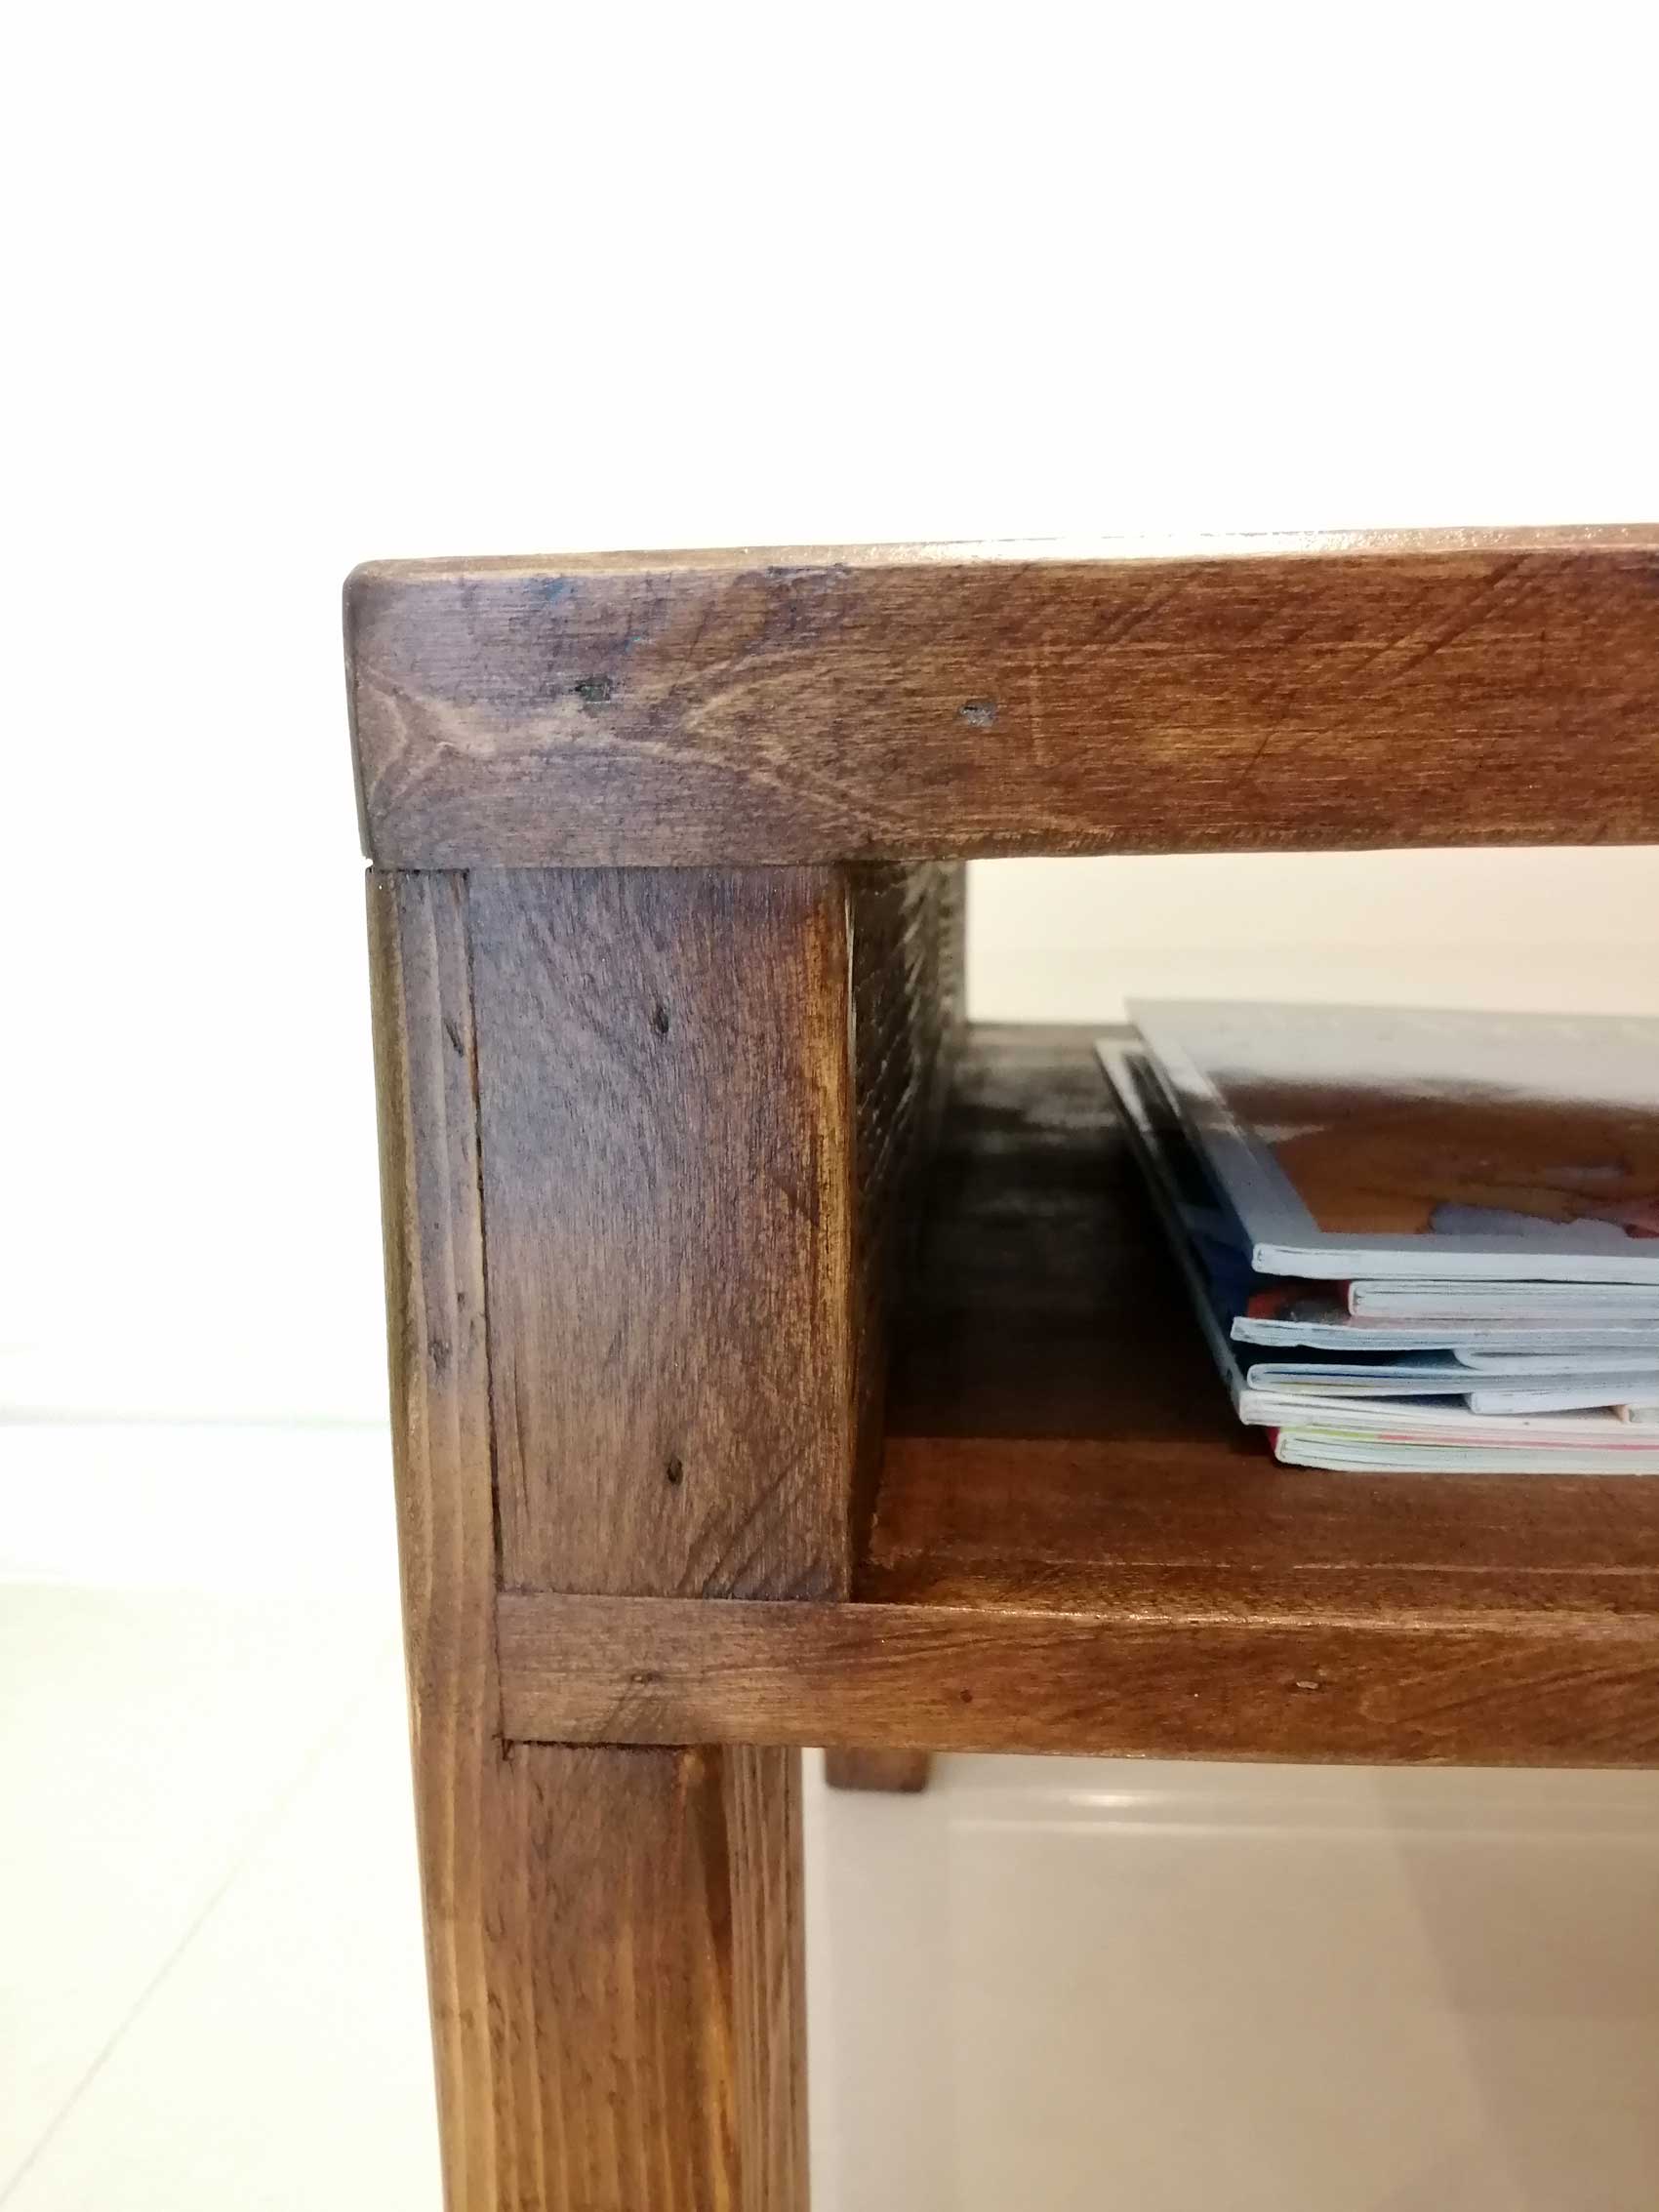
I decided to attach the legs using a rabbet joint. Apparently the name comes from the old French word rabbat which means “a recess into a wall”. After measuring and marking the leg pieces with a cutting guage, I made the cuts with the bandsaw.

I then cleaned up the cuts with a chisel, and made some adjustments to make sure the legs would sit perfectly straight and square.

At this point, I had my table frame with top attached, as well as 4 legs with rabbets cut. Notice in the photo, I also nailed a border around the table top, joining the pieces with 45 degree mitres.

Next I attached the legs with glue, constantly checking that everything was straight and square. This was tricky because the pieces were moving slightly when I clamped them. So I spent quite a lot of time fiddling with it to make sure everything was clamped in exactly the right place.


Once the glue was dry, I secured the legs with some 10mm dowels. The video shows how I do this using a depth stop on my drill and a Wolfcraft Dowelmaster.
And the bit that’s not in the video is where I cut the dowel end off after the glue dried. I used one of my favourite tools for this, a japanese flush cutting hand saw. The teeth on this saw have no set. This means you don’t damage the surrounding wood when making the cut. It’s not impossible, but it’s far more difficult to do this task well with a normal saw.
Tidying up
At this point I imagined the table almost like a piece of clay which I needed to mould into shape. I wanted to remove any protruding edges and ensure everything was smooth, straight and square. This required a lot of sanding and filing.

And here’s an example of a protruding edge that I needed to fix with the plane.


I then applied filler to any large holes that were detrimental to the overall appearance. I usually leave most of the imperfections in place, but sometimes the really bad ones need to be dealt with. My favourite filler is made by Liberon. I’m a fan of theirs because they have great eco-credentials. The colour of the filler looks dark in the photo, but it does lighten as at dries. And it’s a good match for the stain that I planned to use.

Next I did a final check of the general build quality. I realised that one of the legs was a few mm short, so I cut the other 3 to match. Then I added a chamfer to the leg bottoms using the plane, just for a bit of interest.


Finishing the reclaimed wood coffee table
After sanding everything smooth I applied the first coat of Colron medium oak wood dye, using a lint free rag. This step always makes me a bit nervous because the first coat generally looks horrible and patchy.

I then applied the second coat, and you’ll notice things are looking much better.

Finally I added 4 coats of thinned varnish. I thin it with white spirit so that it goes on more smoothly and doesn’t leave bubbles. It still gives a lovely finish, it just means you need to apply more coats to get the full level of protection. I sanded with 400 grit sandpaper in between coats, but did not sand the final coat in order to preserve the full sheen.

Once the varnish was dry I added a bit of wax to further enhance the sheen. My preferred brand is Briwax, and I applied it with a lint free cloth, before leaving it to dry and then buffing. The video shows me buffing like my life depends on it.
The completed reclaimed wood coffee table
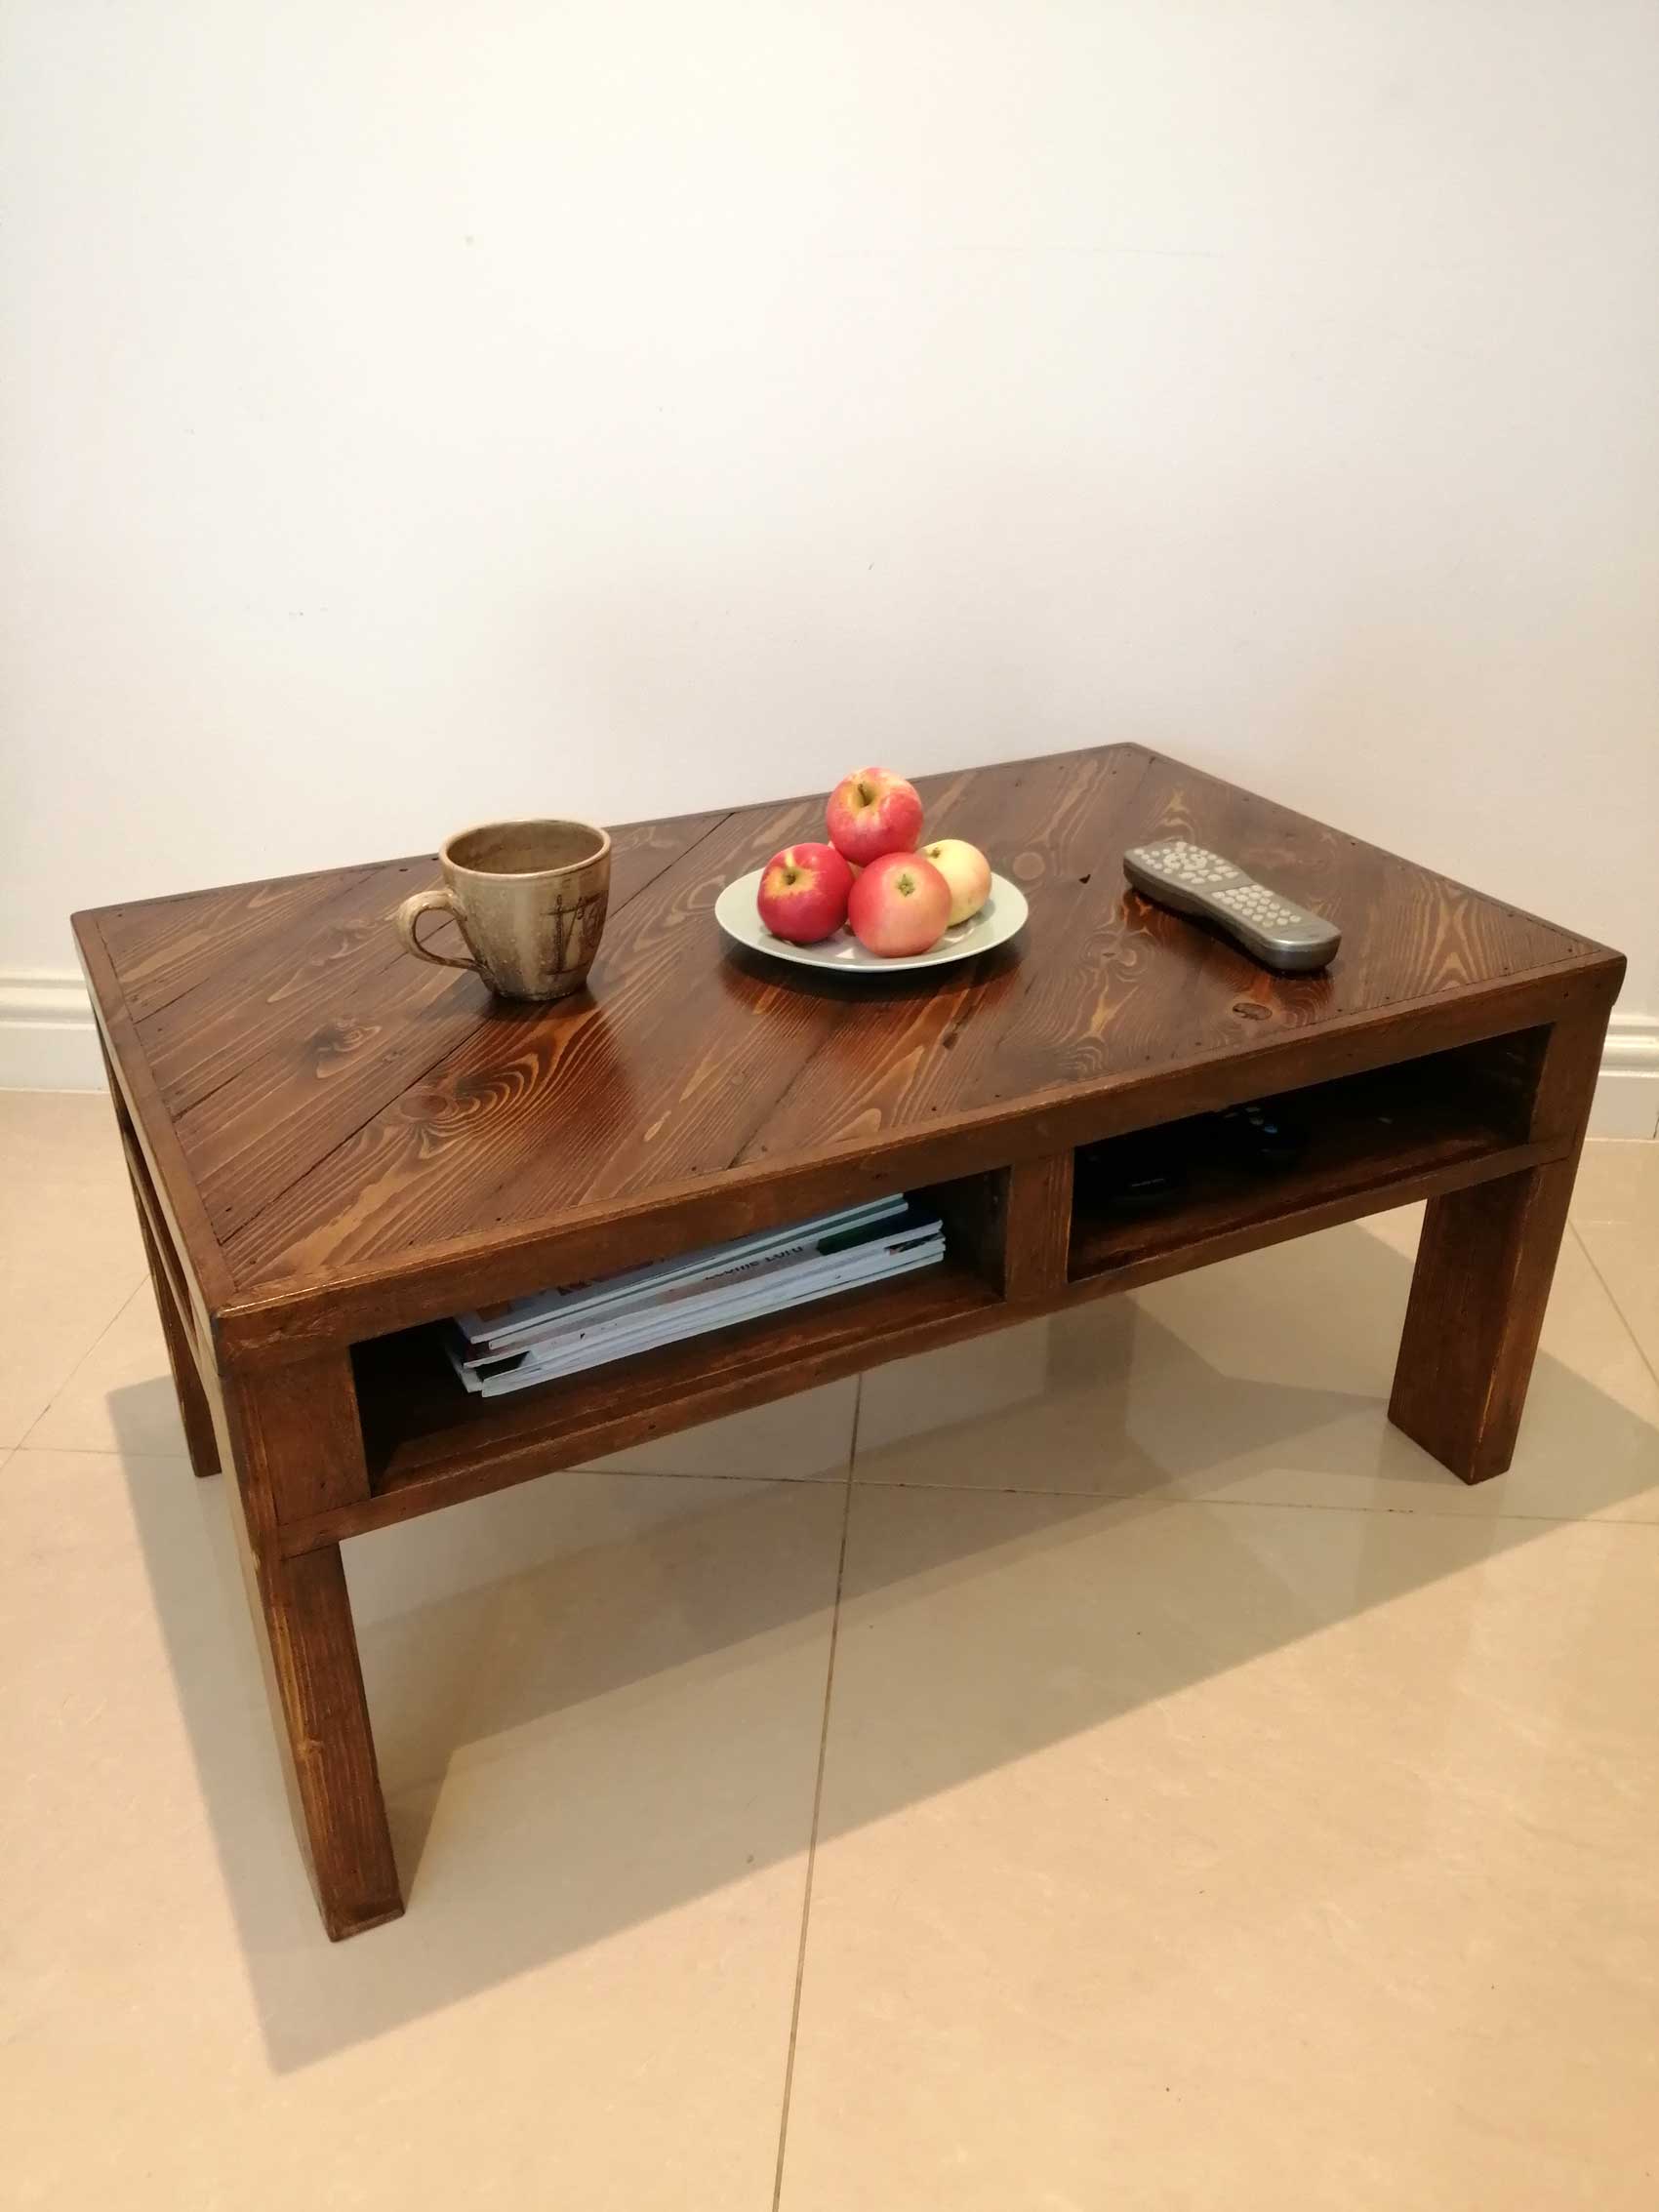
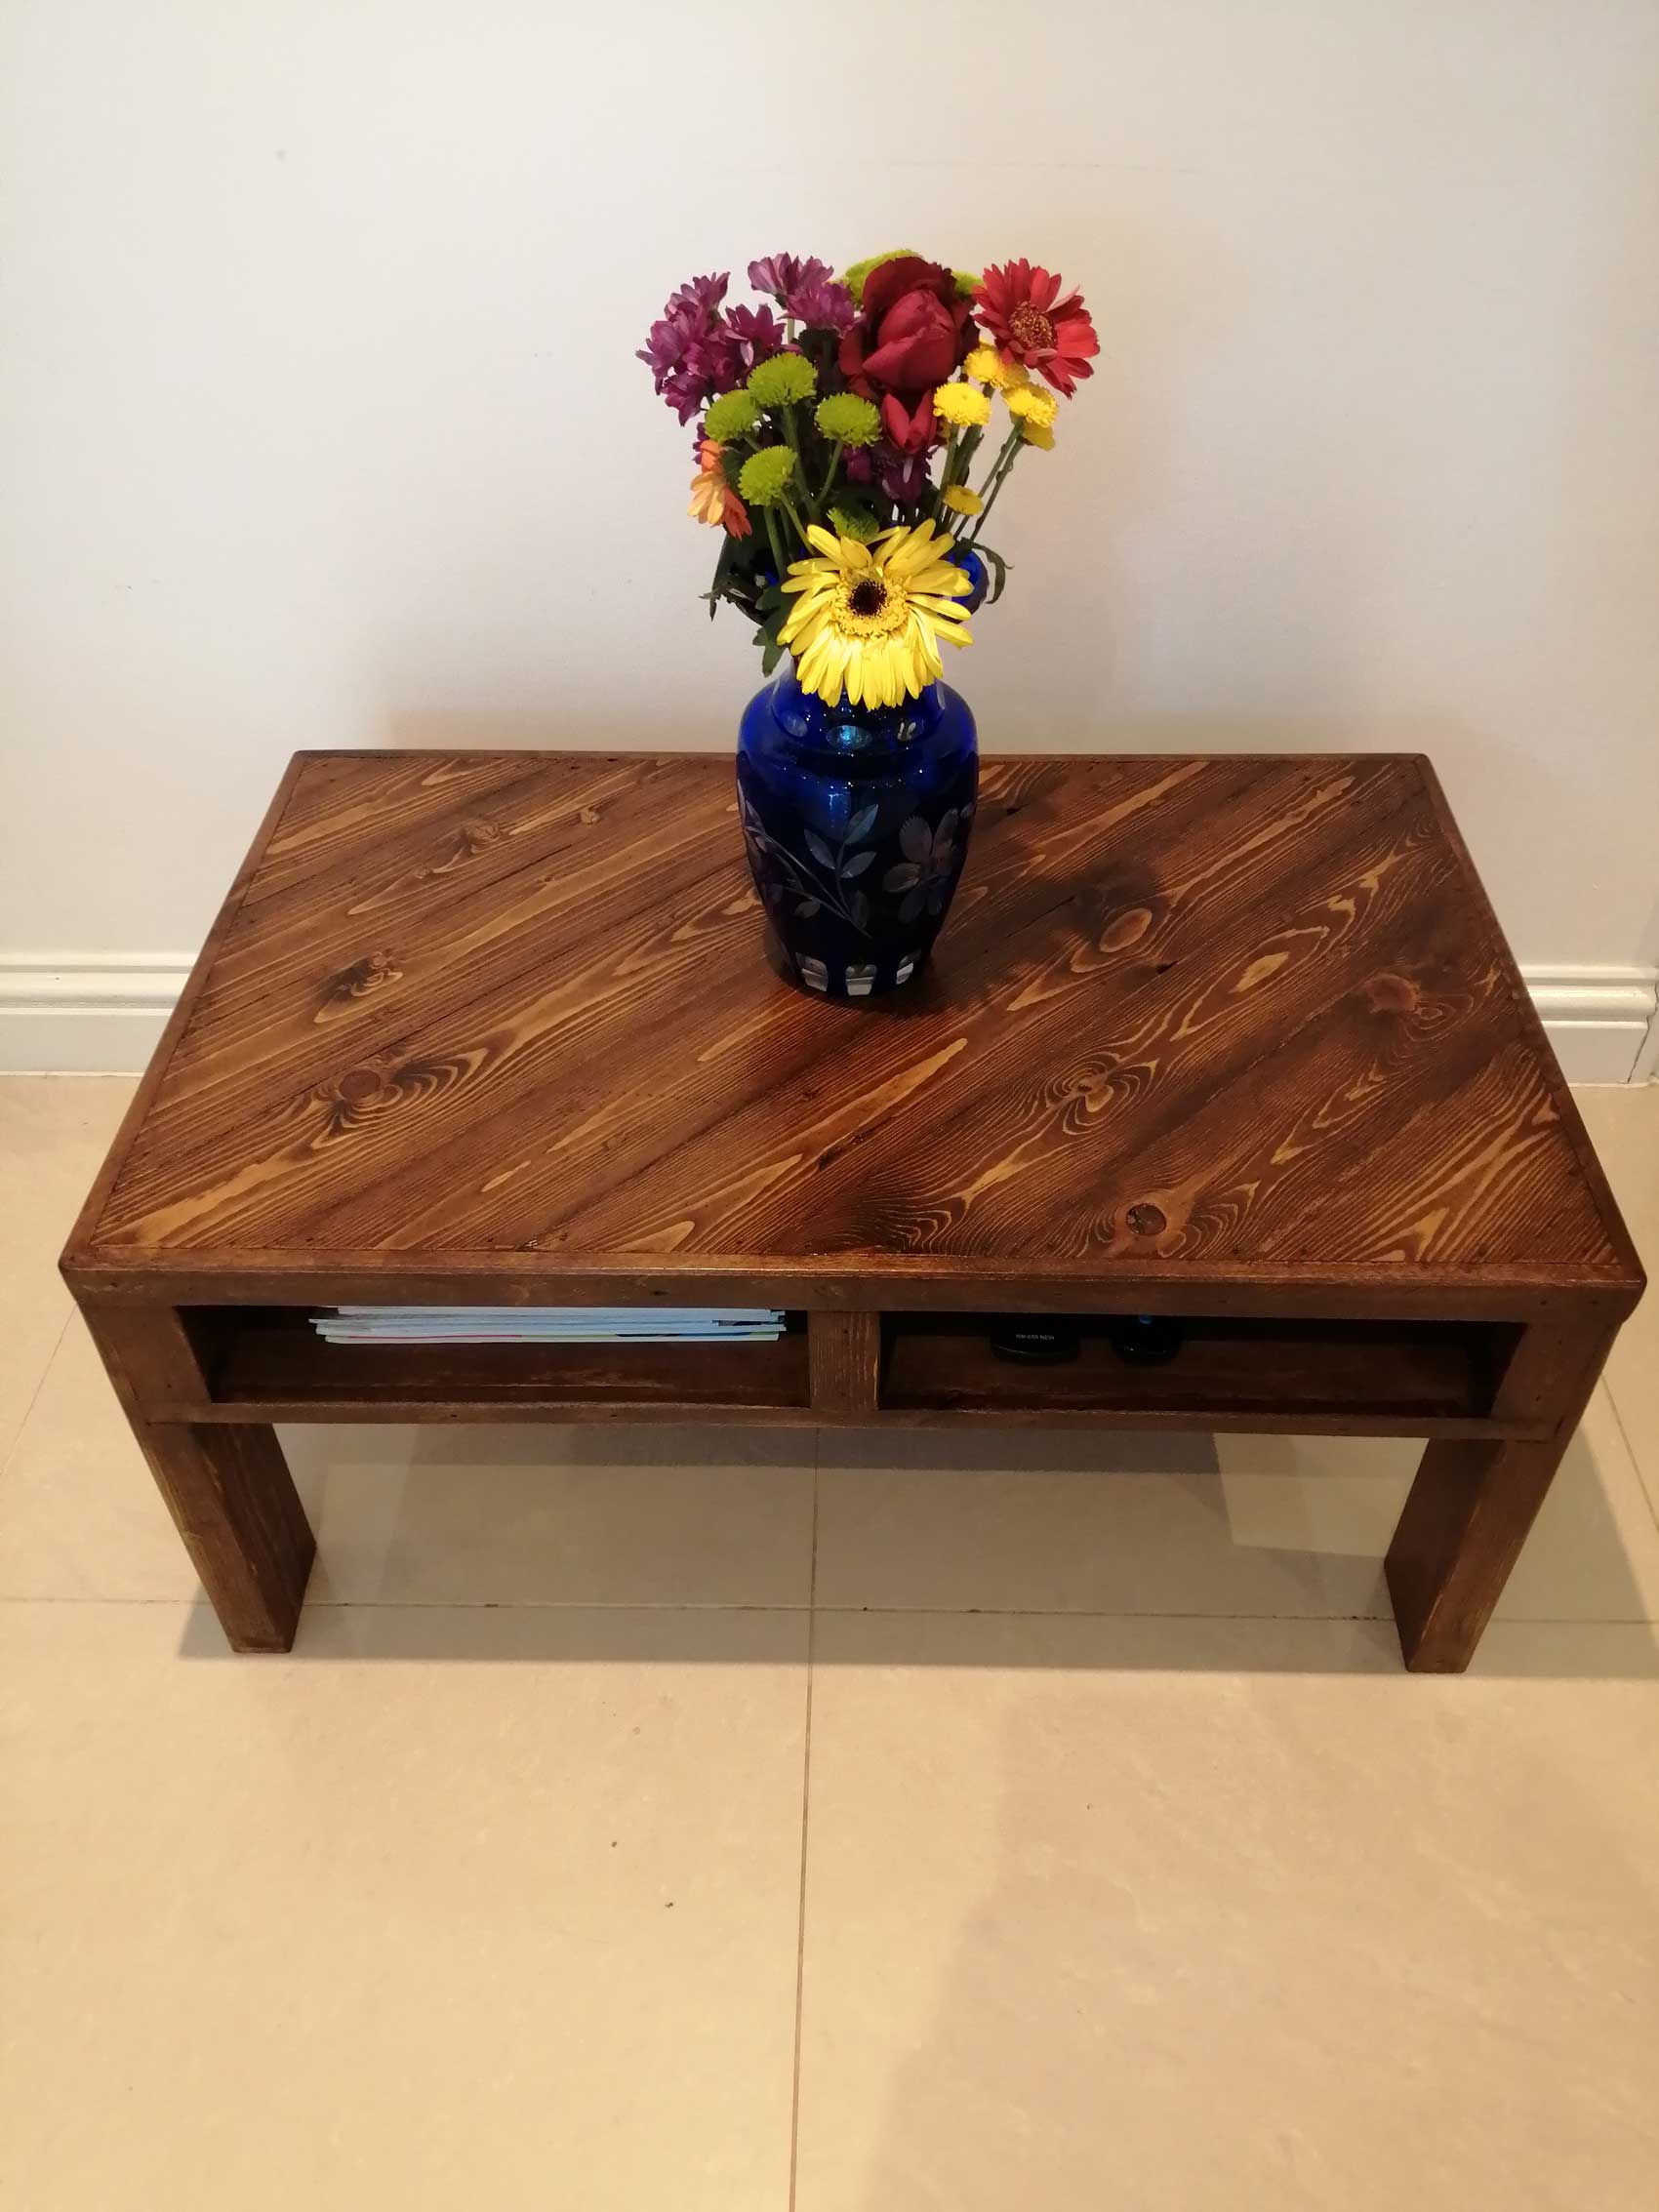
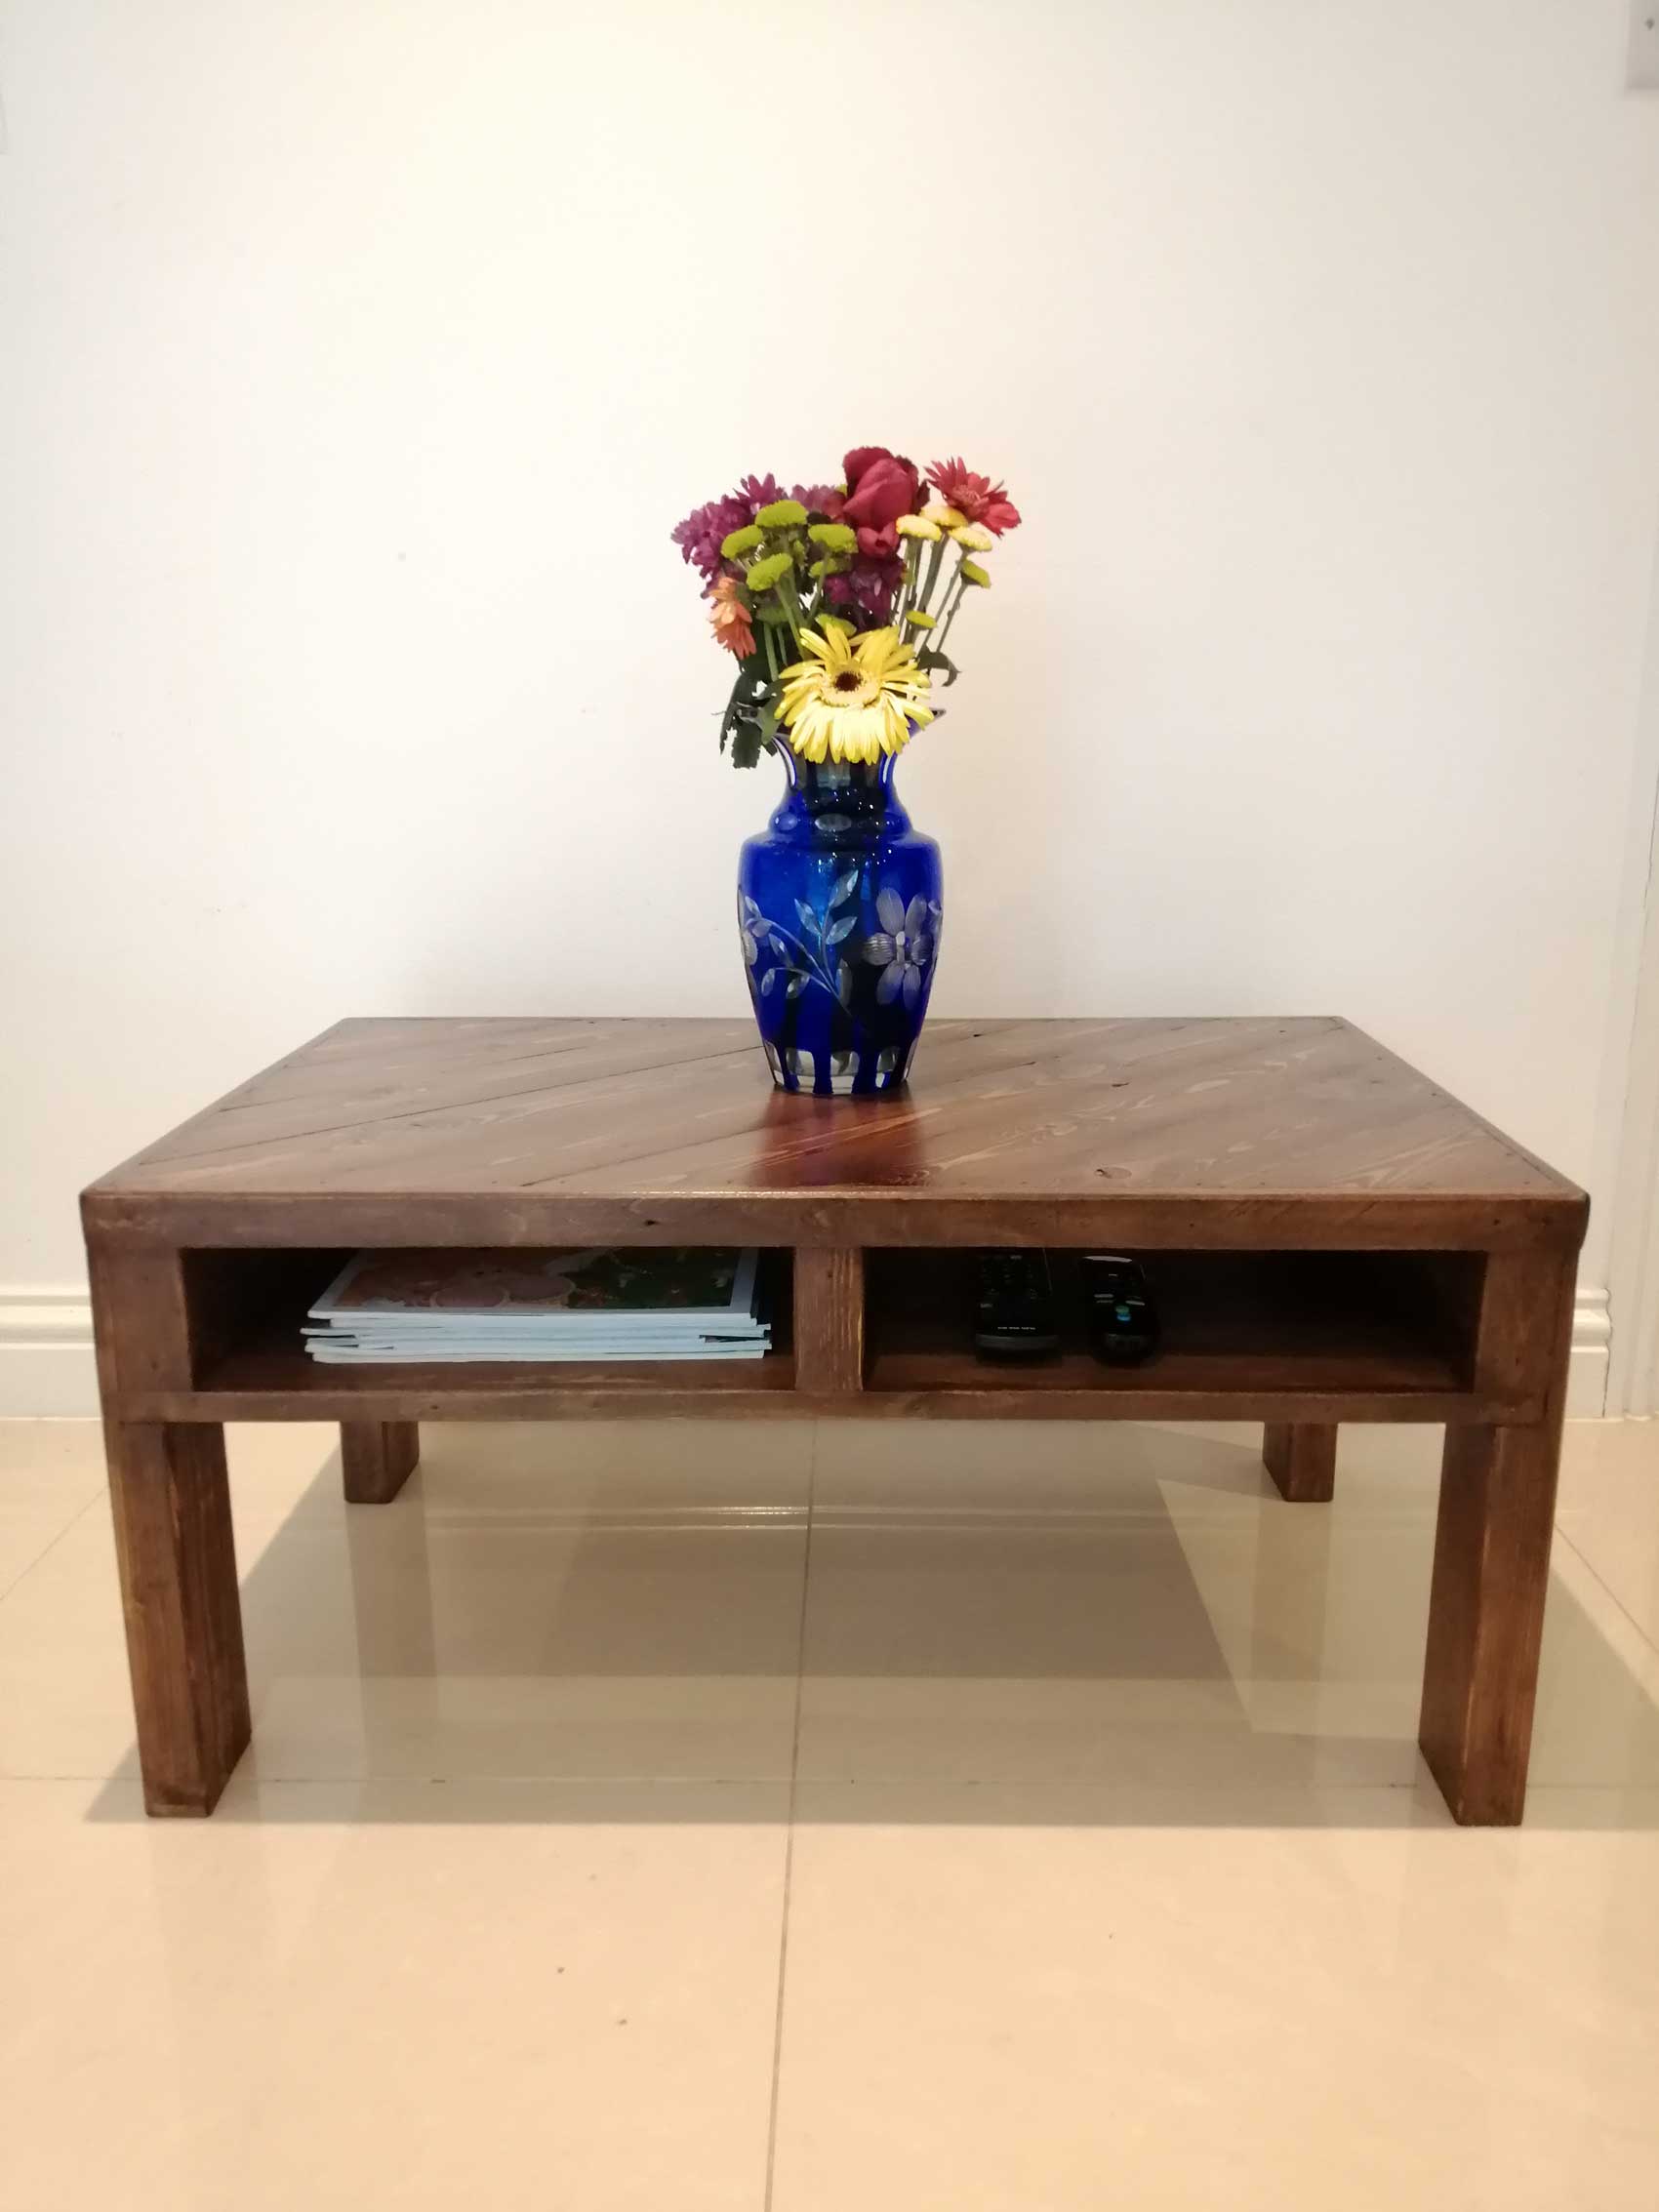


Hopefully this project will provide a bit of inspiration, and some ideas for using up stray pallets. You can see that with the right amount of care, pallet wood can be turned into a high value item with a lovely premium finish.
If you’d like to know more about upcycling, feel free to contact me and I’ll be happy to help. Or you can receive our newsletter to get the latest news, updates and projects straight to your inbox.